
How to Add Your Page To The Navigation
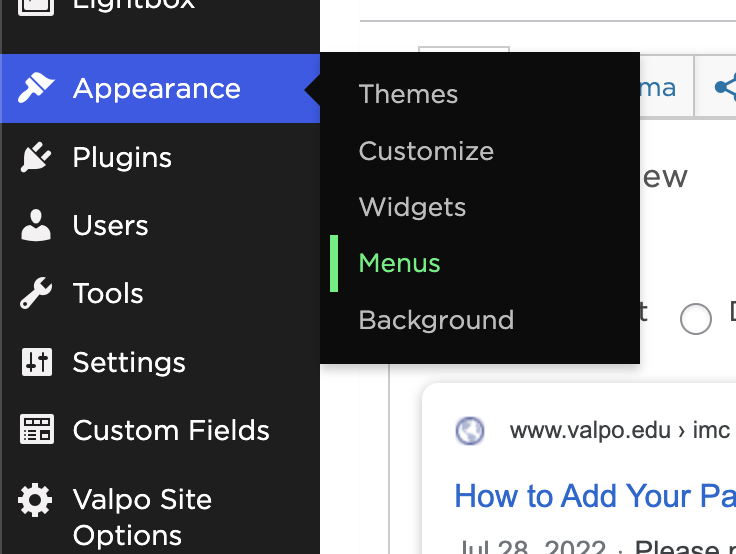
Step 1
Once you are done creating/editing your page, navigate to the appearance tab on the left side of the screen and select “Menus”.
Step 2
Locate the pages tab on the left side under “Add menu items” and find the title of the page you just created. In this case, we will use the title of this page. Click on the checkbox and select the “Add to Menu” button. Make sure Menu Name is “Page Navigation”.
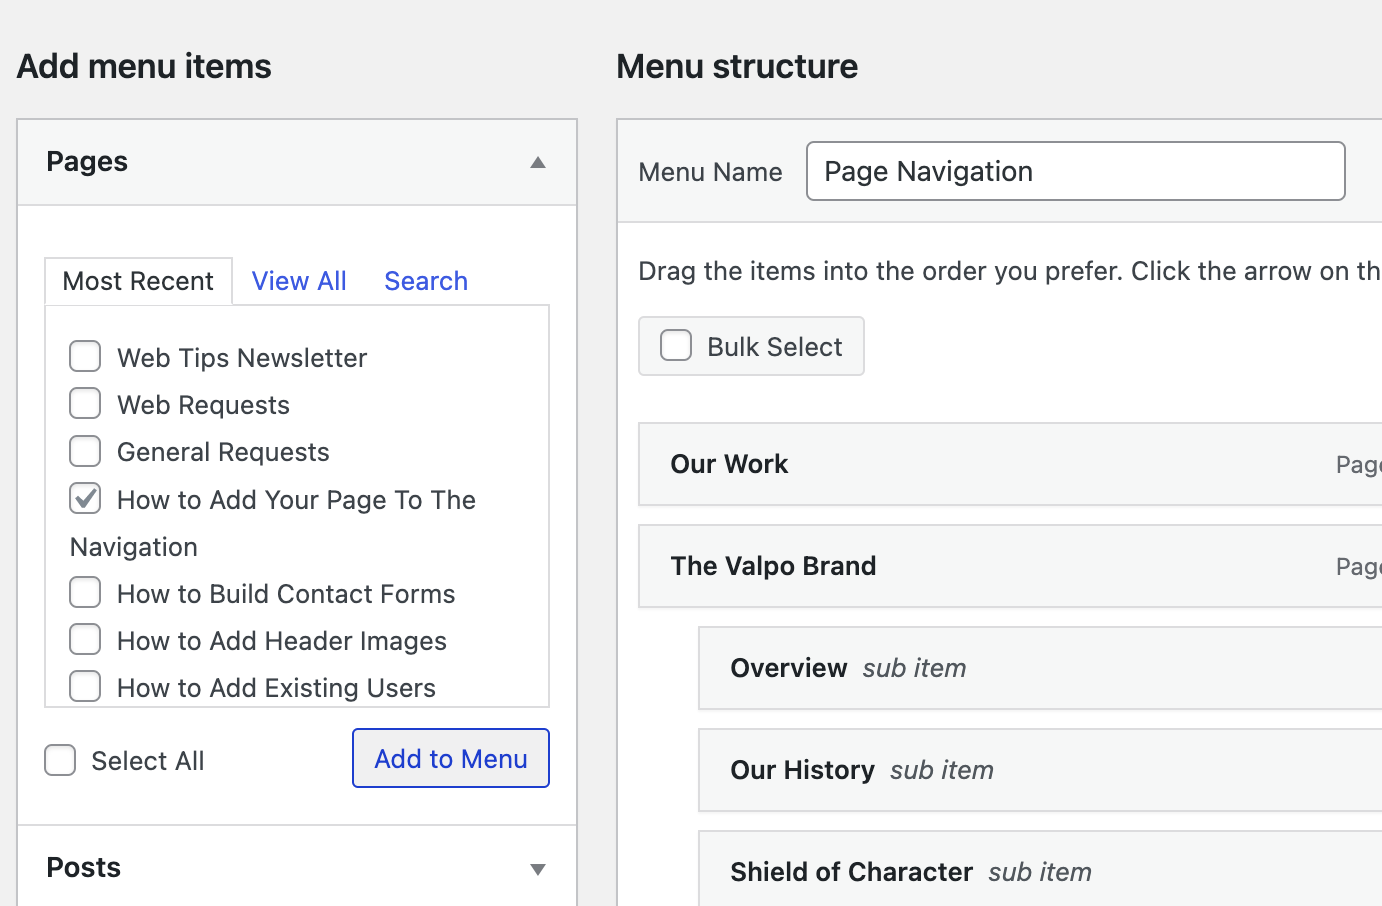
If you can not locate your page title, click on the search tab next to “View All” and type in the title.
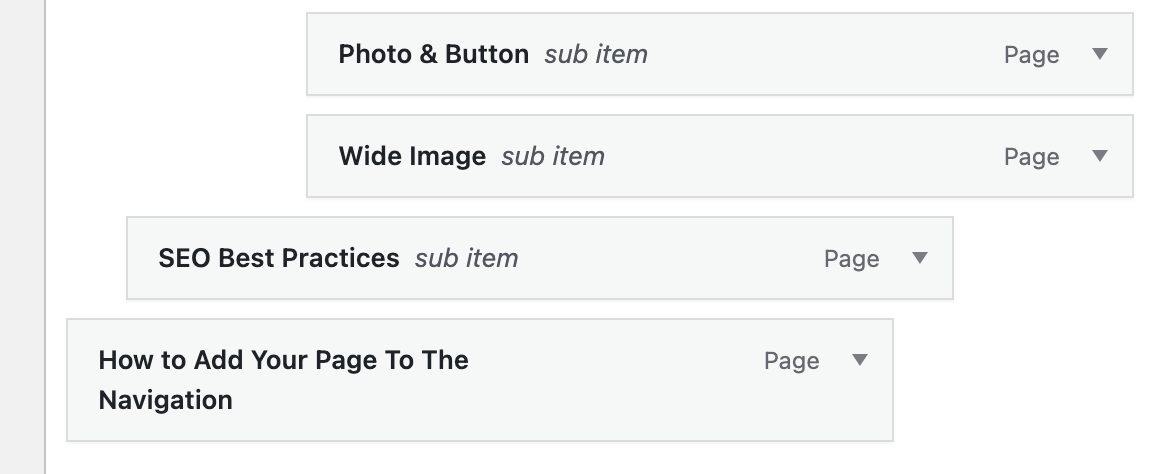
Step 3
Once you added the page to the menu, scroll down all the way to the bottom of the menu to find it.
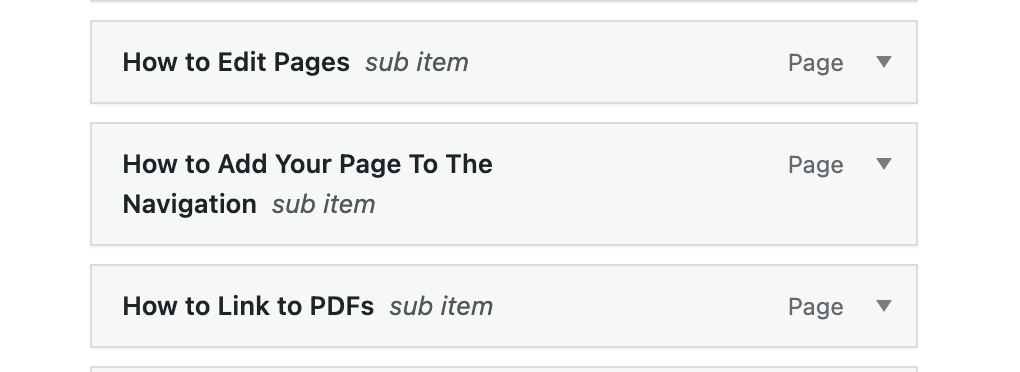
Step 4
Click on the page box and drag it to your desired location on the menu. In our case, we want to add the page beneath “How to Edit Pages” which is housed under “WordPress Training Guide”.
Step 5
Once you have your page in the correct spot, locate the blue “Save Menu” button in the bottom right of the page and click on it.