
How to Add Header Images
Step 1:
In the navigation panel, click the option labeled “Appearance”

Step 2:
Under the Appearance tab, click the option labeled “Header”
Step 3:
In the panel on the left side of the page, click on the button labeled “Add new Image” just below the Current header image

Step 4:
Select the image you want to display as the header in the Media Library or Upload for the image by selecting the Upload Files tab in the top left corner

Step 5:
Once the image is selected, click on the button in the lower right corner labeled, “Select and Crop”
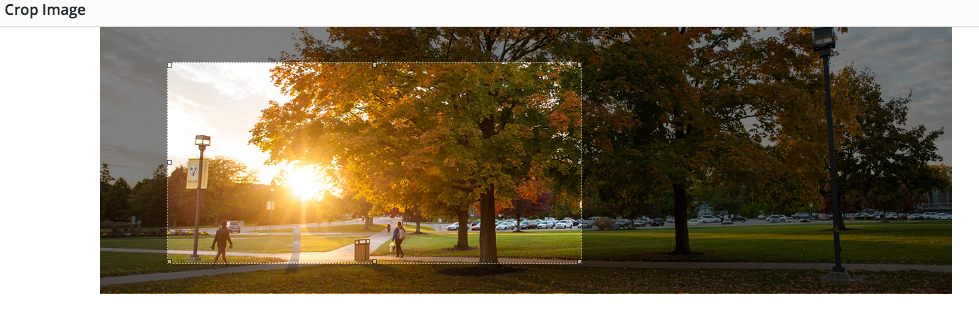
Step 6:
Adjust the guideline of the part of the image you want to crop
WordPress will preview the page with the new header image selected
Step 7:
Remember to Save in the top left corner of the page